Source
- Alexander Yanai Vol 4
- Reel 12, Track 2, Lesson 1
Synopsis
In this lesson, we explore the eye as a physical shape and space. We use the (historically-derived) image of a thin instrument, like a section of clock spring, that can slide in and around the eyeball to the back.
Lesson Outline
- Sitting cross-legged (or similar): think about the eyes proprioceptively (as a part of the body whose size, shape, and movement can be felt).
- Take an imaginary instrument that can pass through the inner angle of the R eye, next to the nose, and wrap around to the back of the eyeball. Slide this instrument from this inner angle to the middle of the brow and return. Discussion of the size: a large peach, and sitting just above the palate. [?] Insert the instrument from the external (right) angle (corner) of the eye. Go down from there, around the bottom of the eyeball, and come up to the interior angle. Open both eyes and see if you feel a difference.
- Same with L eye: start at internal angle; trace over the quarter to the eyebrow and back; continue to the outer angle. Then from the outer angle, go down and then come up along the palate. Where is it in relation to the palate? Continue in these circles, feeling behind the eye.
- Lie on back. Do both eyes together, paying attention to both equally. Then in opposite directions (starting at external angles, going up, then to the internal angle and down). You see your habits in this: which eye is dominant in looking where.
- Sitting again. Paint the two eyebrows together–a line between them–in your imagination. Continue, horizontally, all around the skull. Trace over that line with both hands; each hand in turn, each direction. Change over the legs, and make a parallel line from the bottom of the eyes. Trace over with the R hand in one direction, the L hand in the opposite. Ribbon around the head: where does it pass behind? Lie on your back. Where does the ribbon lie on the floor? Color it in.
- Lying: imagine a chair standing a metre or two above you [over your head on the floor]. Try to look at both legs simultaneously. Then R eye, R leg of chair; L eye, L leg of chair. Then simultaneously. Strain the eyes to push the eyeballs in: feel the pressure from behind. R eye only; L eye only; both. Then back to the legs of the chairs. Can you feel the eyes doing this? Sense the balls rolling? Don’t lift eyebrows etc.
- Look at your two feet this same way. R eye only; L eye only; both. Flip back and forth between your feet and legs of chair.
- Look towards the two feet, then the middle between them; the legs of the chair, and the middle between them. Skip between them: up and down.
- Sit, and “go over those things that we did.”
Focus of Moshe’s Teaching
- Feeling the size and shape: eventually the muscles stop straining so you can feel this.
- Moshe notes that eye exercises should be done by people with healthy eyes too, not only the sick ones. He said this should be like brushing the teeth or to use soap. This should be taught in every school.
Related ATMs
- See also Theme Vision
Resources
- A page from Thomas Young’s Royal Society publication on astigmatism, from the Bernard Becker Medical Library Collection.http://beckerexhibits.wustl.edu/rare/win/PhilTrans1801.html
- The complete Royal Society MS is here: http://dspace.library.cornell.edu/handle/1813/2163 (On the Mechanism of the Eye, by Thomas Young)
- Recorded at kinesophics: http://kinesophics.ca/eyeball_lesson
Share Your Insights (ideas, principles, strategies, experiences, …)
- At the beginning, the suggestion of a “sharp metal instrument” for examining the shape of the eye can be disconcerting. Discussion among practitioners suggest a variety of choices, often soft, thin objects, even including pain brush. Later, the rigidity of the instrument became helpful. The story of the discovery of astigmatism seemed to reduce anxiety. – rblack Dec 1, 2017Rob Black
- Understanding of the function of extraocular eye muscles is not straight forward. For example one muscle “superior oblique” goes through a hitch attached to the frontal bone (?), like being slinged around a corner to pull the eyeball. There’s also lots for coordination required between pulling directions and strength of multiple muscles.
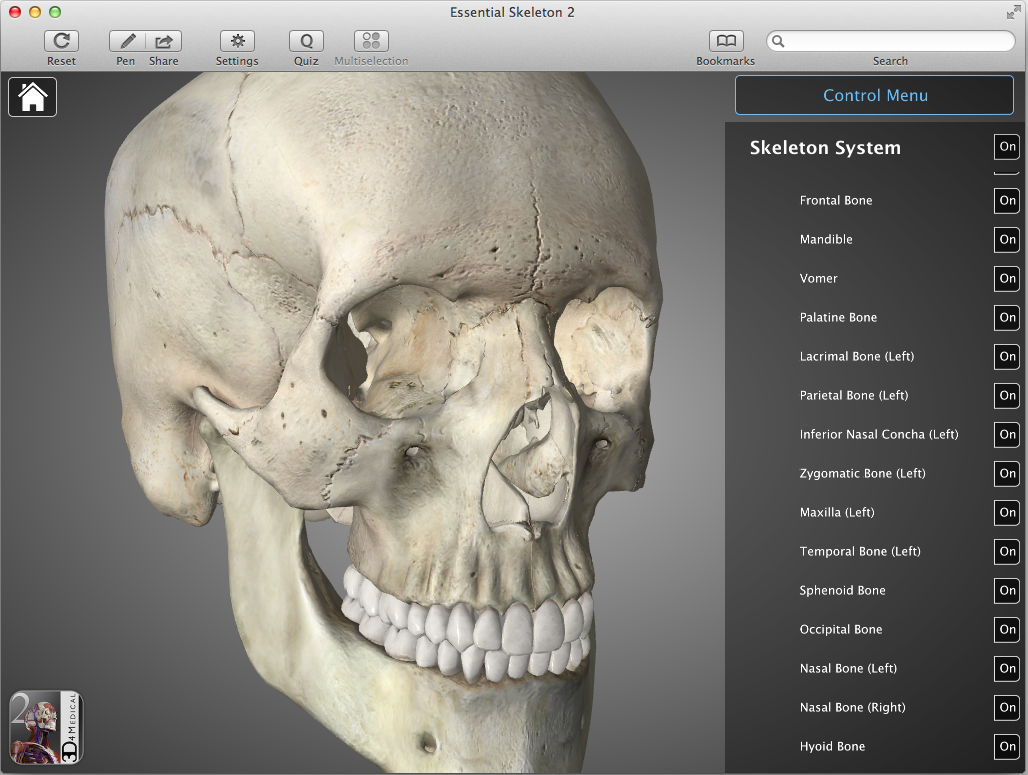
- Moshe gives a verbal picture the eyeball is located directly above the palate (?) [quote: “The eye should be immediately above the palate. Actually, it lies on the palate;”]. It’s really close, but not directly. I put a screenshot here for easier imagination-navigation (app is “Essential Skeleton 2 by 3D4Medical”, free version)
Disclaimer: This site is for sharing information about Feldenkrais® Awareness Through Movement® lessons. The information included on this site is for educational purposes only. Nothing on Feldy Notebook should be construed as an attempt to offer medical advice or treatment.
All contributions to this website are licensed under the Creative Commons Attribution Share-Alike 3.0 License. Do not add any copyrighted information to this website. Feldy Notebook is sponsored by Kinetic Inquiry.
