Source
- Alexander Yanai Vol 11 (501-550)
- Reel 35, Track 3, Lesson 2
- Duration of the recording: 37 minutes
Synopsis
- This lesson develops awareness about the function of the arm, from the shoulder girdle to the fingers – improving the movement on the scapulothoracic joint (by sliding or doing an active stretching), exploring same movements in different positions, and in a non-usual configuration of the hand. This lesson also clarifies the image of the back while exploring it with the arm-behind through directional references and engaging the participation of the trunk and head.
Lesson Outline
- Positions used:
- Sitting (Eastern fashion) leg crossed
- Lying face up (supine)
- Lying face down (prone)
- Some movements to explore and identify:
- Shoulders: internal and external rotation
- Forearms: supination (palm up) and pronation
- Trunk: flexion (head down) and extension (head up)
- Sit cross legged, arms between the legs. Turn the left arm inward so that the palm turns to the ceiling.
- Repeat with the right arm turning the shoulder as well.
- Lie on the back. Do the same thing. Lift the left arm to the ceiling and turn it inward.
- Repeat with the right arm.
- Place the right hand behind your head, on the shoulders. Move your hand from right to left exploring the back of the neck and from one shoulder blade to the other.
- During every movement, turn your hand – once on the back of your hand and once on the palm of your hand.
- Repeat with the left hand – turning the left hand in both ways.
- Lie on your back, left arm to the ceiling, turn the left arm, and with palm facing down interlacing your fingers. <<Note: the elbows are crossed>>
- Lower your arms to your stomach and lift them over your head. Repeat.
- Interlace with the right hand.
- Do the non-habitual interlacing.
- Then, turn your hand until the left hand is above. Do the non-habitual interlacing, the habitual, and the non-habitual, the habitual and the non-habitual.
- Move your arms up and down.
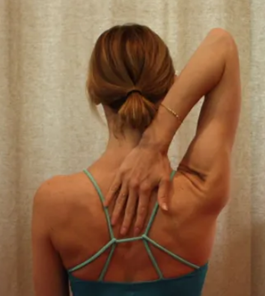
- Sit cross legged but change over the legs. Place the right arm with the back of your hand behind your neck (fingernails in the direction of the neck). Turn your hand, once the palm, once the back of your hand.
- Repeat with the L arm and hand.
- With your arms in the front, turn left arm inwards. Hold it with the right hand (interlacing fingers). Lift your arm and go down.
- Move your hands closer to the body in the direction of the sternum -by bending the elbows- and having the face comes closer to your stomach. Your arms touch the body. Then invert your hands (next to the sternum) and take your hand inside-out
- Repeat with the left arm like it is, but with fingers interlaced in the non-habitual way.
- Repeat with other hand, i.e. turn inwards the right arm with the palm up, hold your fingers with the left hand and do the same thing.
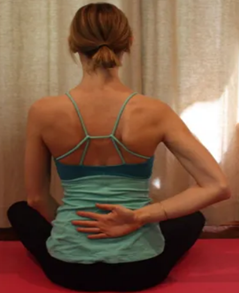
- Place the palm of the right hand behind on your low back and move it to wherever it will go.
- Turn your hand over and do the same thing.
- Go down. Each time, turn your hand once like this and like that.
- Do the same thing with the other hand.
- Lie on your back, extend the legs, lift the left arm to the ceiling. Turn it like we have been turning it. Hold it with the right hand interlacing fingers. Move your arms above your head. Bend the elbows a bit and lift your head.
- Repeat with the non-habitual interlacing.
- Extend your arms to the ceiling and turn the right arm. Hold it with the left hand (interlacing fingers) and continue.
- Lift your head and try to turn your arms. “When you come behind your head and your head is lifted, it comes to a place, to a space between your hands and your head, where the friction is not great. There it is possible to turn the palms of your hands. It is easy to do the moment that your head lifts more or less humanly. Here is the main benefit of the movement. Your head lifts high in this situation.”
- Change over the interlacing and do the non-habitual interlacing.
- Lie on your stomach and spread the legs, flat down (toes are extended). Interlace your fingers behind the back. Move your hands right and left. “if you really want to do the movement, your head needs to turn once to the right and once to the left, or you are limited.”
- Lift your head (if possible). Turn your hands.
- Turn your head to the left side. Look to the left and turn your hands over. Your fingers are interlaced. And, like this, your hands roll on the back.
- Lie of your stomach, interface non-habitually your fingers behind the back, turn the face to the right. Roll your hands.
- Sit cross-legged, turn the left arm in front of the body, hold it with the right hand, interlace your fingers, lift your arms over your head (bending the elbows and turning your hands) till they can be behind the neck/head. Bend your head to make it easier.
- Extend your arms up in front of your head and behind your head. Go up and down.
- Change over the legs. Turn the right arm with the palm to the ceiling. Hold it with the left [hand] interlacing figures and repeat #10.
- Lie on your back. Lift your head. Do the movement with your arms.
- Change over your hands.
- Interlace your fingers behind the pelvis. Turn your hands like we did while [lying] on your stomach.
- Place both palms of your hands in front as if for praying. Keep palms together and explore turning your hands. In this
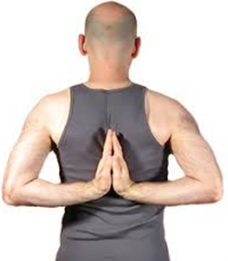
- Place both hands on your low back, palms in contact with your fingers touching, pointing down. Turn your fingers upward. (Like reverse praying).
- Lie on your stomach and try to do the same thing. Lifting your head at the right moment will make it easier.
- try to place your hands behind normally. Place the palms together move them from right to left
- Turn them over and try to move them right and left. Palms together. Fingers pointing up.
- Sit and turn the left arm, hold it with the right and interlace your fingers. Move the arms upwards and behind your head.
- Do the non-habitual interlacing and continue.
- do the same thing with the right hand up.
- Stand. Lift your arms. Try to comb your hair from behind.
Focus of the teaching
- “If you move the elbows away, if you lift it and go down because in sitting, the weight of your hands below helps your head to understand how to turn it. Then, we learn how to bring your hands up. Of course, the problem is that you must turn. Bend your head. Bend the body. [Do] all the things that you usually do not do. Make your hands into two left hands.”
- “Bend your head. Straighten it. Do whatever is necessary so it will be possible to roll your hands. There is a different demand from the body in each different situation and you do not need to learn it. It knows it. Leave it.”
Related ATMs
- Theme Yoga Poses
- Theme Shoulders
- Tag Fingers-interlaced-inverting-hands
- Tag Fingers-interlaced-inverted-overhead
Sliding palms on back:
- AY287 General continuation
- AY384 Holding hand in hand on the back
- AY540 Fingers interlaced and inverted over the head and in front
- MM03 Exploring the Floor: The Movements of the Shoulder
Exploring the back with the hands:
- AY540 Fingers interlaced and inverted over the head and in front
- MM03 Exploring the Floor: The Movements of the Shoulder
- SF2 – Week 01 – 15 June 1976: Fingers Interlaced, Inverting Hands continued
- SF2 – Week 02 – 22 June 1976: Fingers Interlaced, Inverting Hands continued
Fingers interlaced behind the back, prone:
- Amherst 2 – Week 2 – 06/18/81 pm2 Roll Lying to Sitting From the Stomach
- SF2 – Week 01 – 15 June 1976: Fingers Interlaced, Inverting Hands continued
Fingers interlaced, inverted – behind the back, prone:
Namaste behind the back:
- Amherst 1 – Week 9 – 08/05/80 AM1 Differentiation of arms – sitting
- Amherst 2 – Week 6 – 07/13/81 Supine interlacing fingers / Clasped Hands Rotation
- AY546 Inverting hands in clapping
- SF2 – Week 02 – 22 June 1976: Fingers Interlaced, Inverting Hands continued
Resources
- Anatomy
- Shoulder girdle: constitutes a multifaceted joint complex between the upper extremity and the thorax. It serves to maintain contact of the upper extremity to the torso while providing a complex three-dimensional range of motion.
- The scapulothoracic joint is not a true anatomical joint but is rather considered as a unit that gathers the sternoclavicular and acromioclavicular (AC) joints and the junction between the anterior surface of the scapula and the thoracic cage (scapulothoracic junction).
- Image of Cow Face Pose (Photo by Ketut Subiyanto from pexels.com)
- Reverse prayer
- Internal rotation + supination
- External rotation + pronation
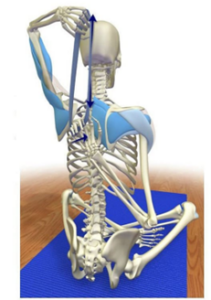
- Anatomical image of Cow Pose
- Video of Cow Pose
Share Your Insights (ideas, principles, strategies, experiences, …)
- Add your thoughts about the lesson here.
- Please sign your comments
- Differing viewpoints are welcome and desired!
Disclaimer: The information included on this site is for educational purposes only. Nothing on Feldy Notebook should be construed as an attempt to offer medical advice or treatment.
All contributions to this website are licensed under the Creative Commons Attribution Share-Alike 3.0 License. Do not add any copyrighted information to this website. Feldy Notebook is sponsored by Kinetic Inquiry.
